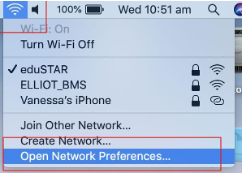
Step 1. Click the Wifi icon on the finder bar in the top right corner
Step 2. Click Open Network Preferences
Step 3. Select Wi-Fi then Click the Advanced Button

Step 4. Select the eduSTAR network and remove it by clicking on the - (minus) sign (Note! If the eduSTAR network is not listed under the Preferred Networks cancel and go to Step 6)
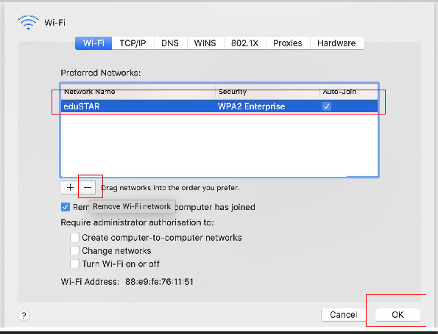
Step 5. Click “Ok” then “Apply” on the next window and close all window
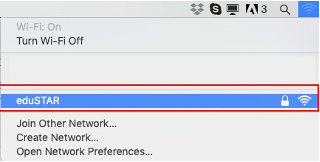
Step 6. Click on the “WiFi” icon in the top menu bar and select the network named “eduSTAR”
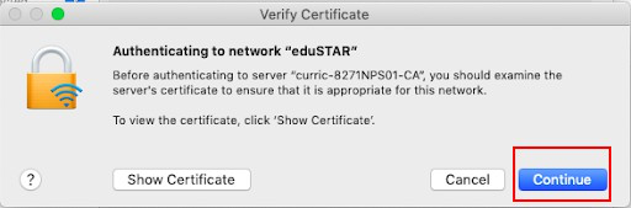
Step 7. In the pop up box under Account Name: enter your edupass details as below.
Account Name:
Edu001\TO number
Password :
EduPass Password
Step 8. Click the blue button labeled ”Continue”
Step 9. Enter your username and password for YOUR LAPTOP if prompted.
Step 10. Please Check that your Proxy is set to Off or Automatic(DO NOT SKIP THIS STEP)
Goto > System Preferences. Click the “Network” icon. Select > Wi-Fi and Click Advanced
Goto > the Proxy Tab and tick “Auto Proxy Discovery”. Then Click Apply

Success! You should now be connected to the internet. To test this open up a web browser (Google Chrome, Safari etc) and Google Cats. If you get pictures of cute little kitties you know you have connected successfully.
If not please contact IT Office for help.
Was this article helpful?
That’s Great!
Thank you for your feedback
Sorry! We couldn't be helpful
Thank you for your feedback
Feedback sent
We appreciate your effort and will try to fix the article